
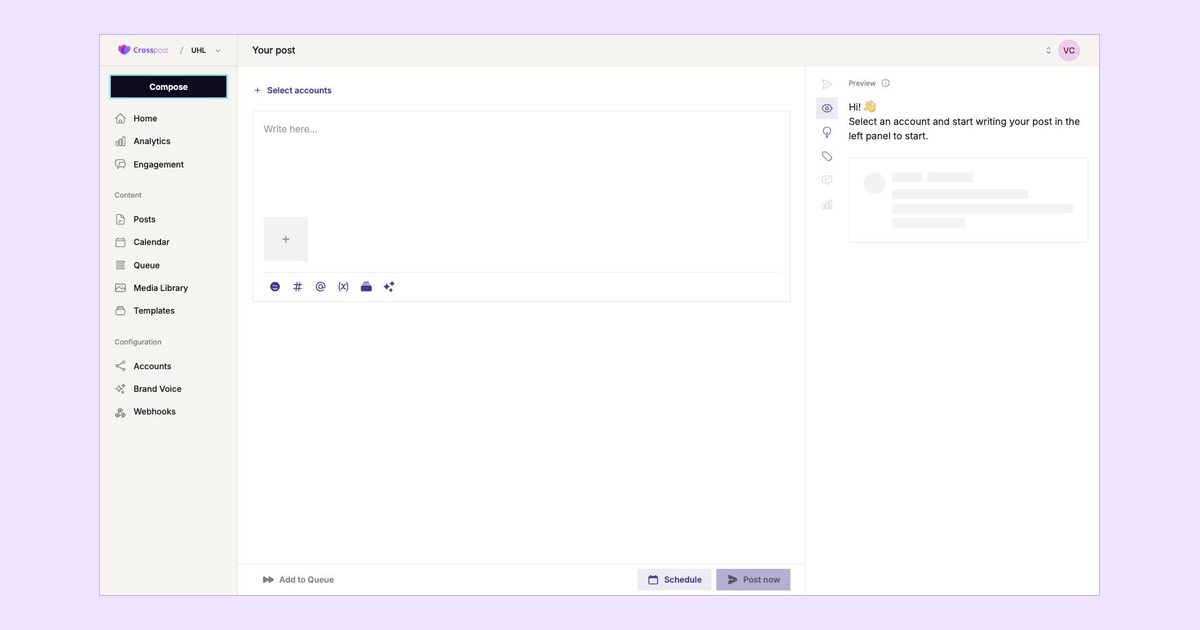
CrossPost is one social media management app for all your networks: Facebook, Instagram, TikTok, LinkedIn, X, YouTube, Pinterest, Mastodon, Threads and Bluesky. This guide walks you from a fresh workspace to your first published post. You do not need anything prepared, just the login details of the accounts you want to connect.
Step 1: create your workspace
Sign in at smm.uhl.agency. On your first visit CrossPost asks you to name a workspace. A workspace holds everything that belongs together: connected accounts, posts, media, templates and the Brand Voice settings. If you look after several brands or clients, you can add more workspaces later and switch between them from the top bar, so each one keeps its own accounts and content separate.
Step 2: connect your first networks
Open Accounts in the Configuration section of the sidebar and choose a network. CrossPost sends you to that network’s own login page, where you authorise the connection. Nothing is scraped and no password is stored in CrossPost; the network issues a token that you can revoke at any time from your account settings there. Some networks ask you to pick a page or profile if you manage more than one.
Start with the two accounts you use most. The free Connect & Share plan covers two accounts and 30 scheduled posts per month, which is enough to learn the workflow. When you need more, the Amplify Presence plan removes the limits on accounts and posts.
Step 3: write your post in Compose
Click the Compose button at the top of the sidebar. The screen has two halves: the editor on the left and the preview on the right.
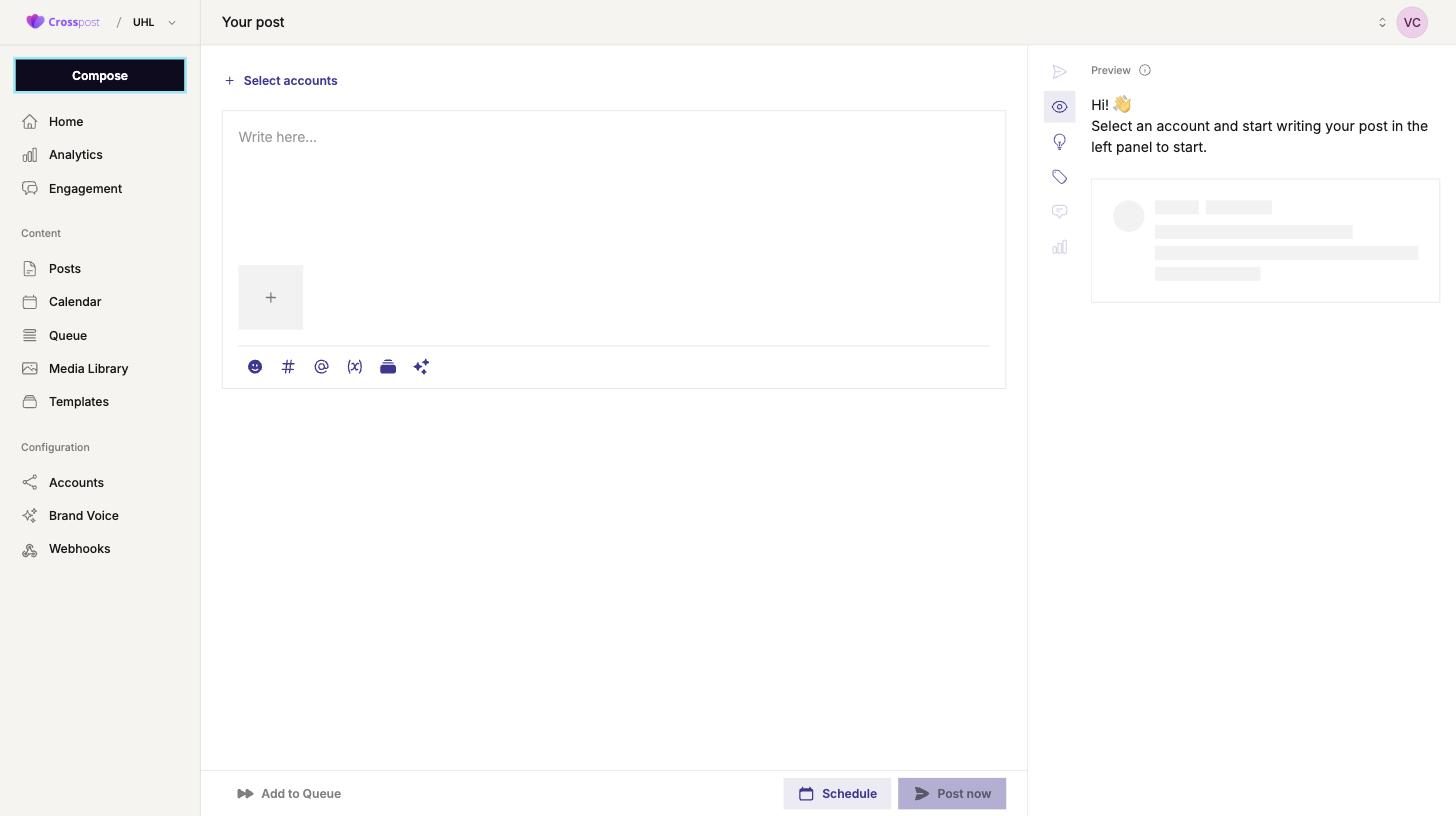
- Select accounts. Tick the accounts this post should go to. You can mix networks freely.
- Write once. Type your text in the editor. The toolbar under the text box gives you emoji, hashtags, mentions and variables. Variables such as
{{platform}}and{{account}}are replaced with the real network and account name when the post goes out, which is handy when the same text is published to several places. - Add media. The plus tile and the media picker let you upload an image or video, or reuse something from your Media Library.
- Ask for a hand. The sparkle button is the AI assist. It can rewrite or extend your draft and follows the tone you define in Brand Voice.
Step 4: check the per-network preview
The right-hand panel shows how the post will look on each selected network. Switch between them before you publish. Character limits, link handling and media formats differ from network to network, and the preview is the quickest way to spot a caption that is too long for one of them or a hashtag block that looks fine on Instagram but heavy on LinkedIn. If something is off for one network only, adjust the text for that account rather than for all of them.
Step 5: Post now, Schedule or Add to Queue
The three buttons at the bottom of Compose are the three ways a post can leave CrossPost.
- Post now publishes immediately to every selected account. Use it for anything time-critical.
- Schedule lets you pick an exact date and time. The post appears in the Calendar and is published automatically when the time comes. Use it for announcements, events and anything tied to a date.
- Add to Queue drops the post into the next free slot of your posting schedule. You do not choose a time; the Queue does. Use it for evergreen content that just needs to go out at a steady rhythm.
For your very first post, choose Post now with a short greeting or a behind-the-scenes photo. Seeing it appear on the live networks confirms that the connections work, and you will have a clean reference point in Analytics later on.
What happens after you publish
Every post shows up under Posts with its status per account, so you can see at a glance whether each network accepted it. Replies and comments arrive in the Engagement inbox, and the Analytics summary starts counting followers and published posts from day one. The features page has an overview of everything else in the app, including Templates, Brand Voice, Webhooks and the Media Library.
Next step
Log in at smm.uhl.agency, connect two accounts and publish one post today. Once that works, the next guide shows you how to plan a whole week in one sitting with the calendar and the queue.